Tuesday, August 23, 2016

Dining Table Makeover

Happy Tuesday everyone!

Remember how I posted about our Dining Chair Makeover?  I thought it was about time I updated with a few photos of our table as well.

Just as a reminder, here's what it looked like when we bought it:


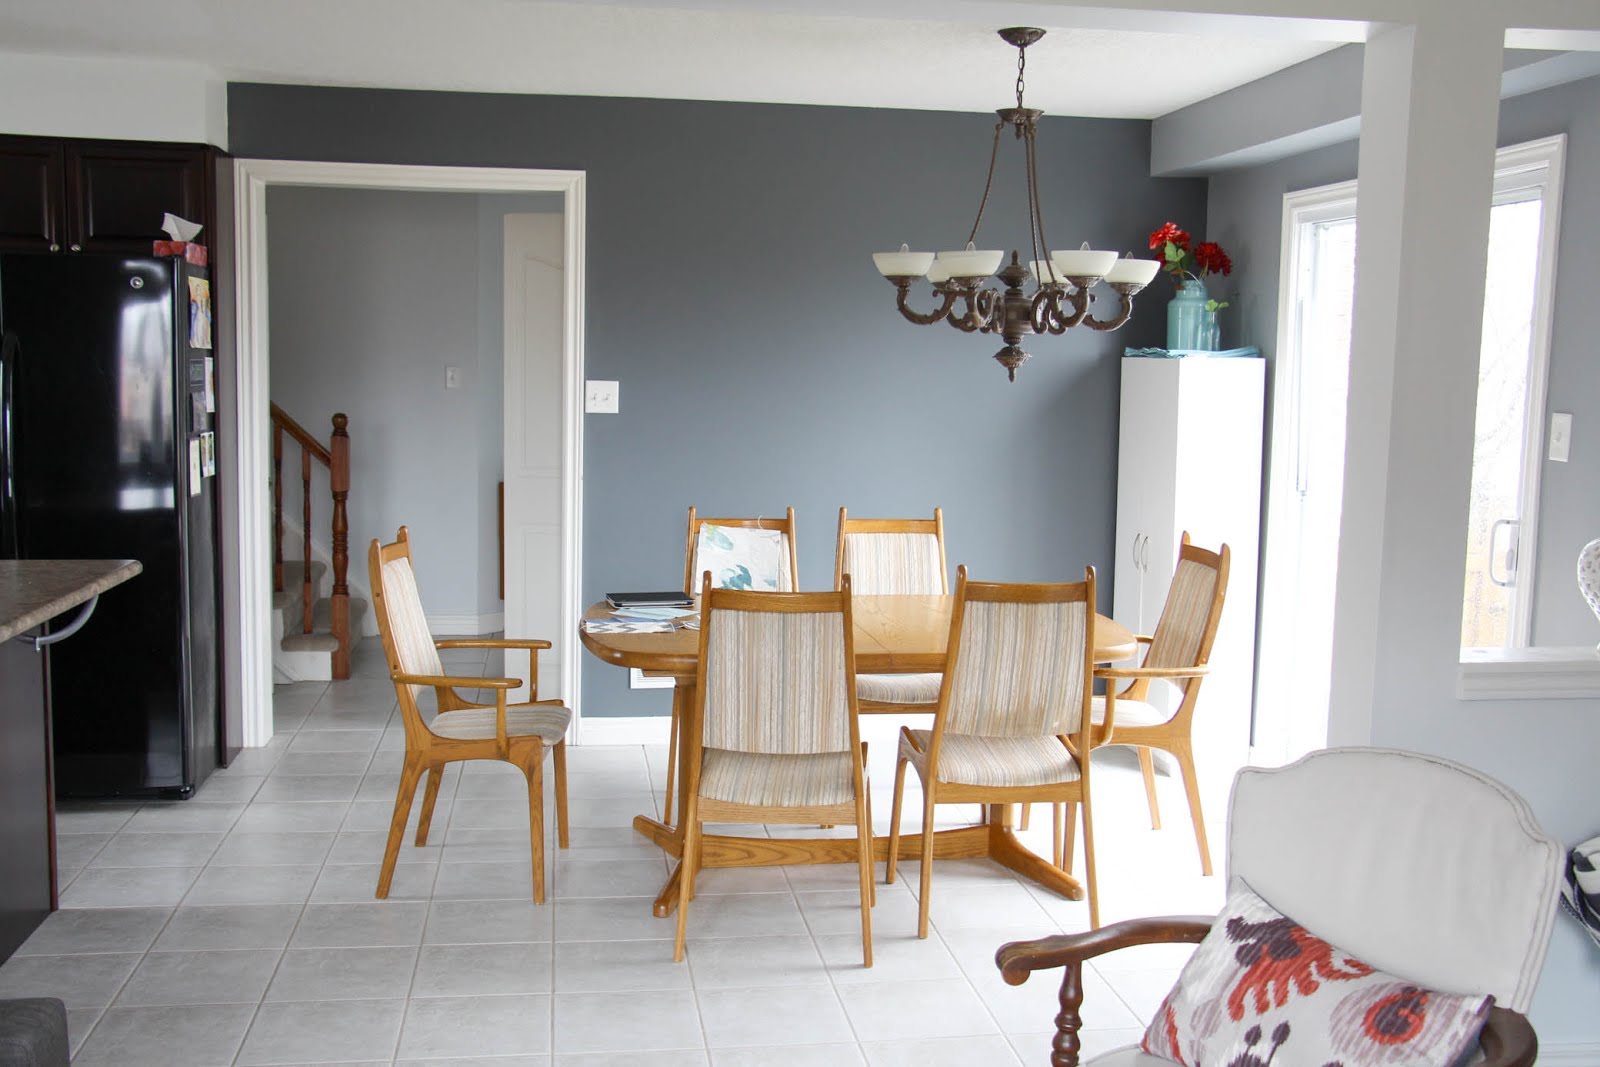
And here it is with the chairs painted and reupholstered:


Not bad!  I didn't mind the oak colour of the table, not really.  But we both really loved the idea of a darker wood, so we decided to strip and re-stain it.  The legs of the table came off easily, and we sanded them down and sprayed them white.  Honestly, it was less daunting/time consuming to paint them instead of stripping and staining.  Plus, I had seen the two tone look around and was inspired to give it a try.


Then, we sanded the top right down to the bare wood.


Then we got to work staining it, which was a patient process.  Here it is after the first coat:


After the first couple of coats of stain, we were getting near the bottom of the can and the stain was getting thicker.  We really should have been more diligent about stirring, because we ended up with one WAY TOO THICK coat and the table was nearly black - plus streaky and sticky.  TERRIBLE.  Thankfully, we were able to sand it off without going straight down to the bare wood again.  But it was a frustrating setback and a lesson learned to STIR as you go!

Here it is before the varnish!


And inside, getting varnished!  This part was fairly straight forward.  We chose a satin varnish, which is just glossy enough to wipe off well, but not super shiny.  This took a number of coats as well, with light sanding in between.


And voila!  All done :)


Here it is today!  The stain and varnish has held up VERY well, as well as the white paint.  A couple of the chair seats have some pulls in the fabric but other than that, the fabric is in great shape as well! Soon we'll have a baby booster on one of the chairs, so that's subject to change :)


Wednesday, August 10, 2016

DIY Antique-Style Map


Here's a little peek into our nursery!  When we found out we were having a baby, I think I was most excited about decorating the room.  I loved the challenge of creating a calm but colourful and gender neutral space.  Since we love to travel, we knew that we wanted to include a world map in the room.  We also wanted an animal theme, since Bryce has quite the collection of animal figurines.  When I found this graphic on Etsy, I knew it was perfect.  (Thanks Decorart Design!)


At first, we planned to print it as a poster.  But I wanted it to be pretty big, which can get pricey.  Plus, we would need to find a way to frame it, which adds up as well.  The more I thought about it, the more I wished it would be fabric so that it would look similar to an antique style map.  I remembered this project, where I turned a tea towel into art and I thought we could do something similar.

So, I discovered Spoonflower.com where you can upload a graphic and custom design your own fabric.  Sold!  It took a bit of figuring to order the design, so here's a screenshot of the Spoonflower order to help you out:


The finished size is 24" x 36", which was perfect for above our crib.  And $15.75 was totally reasonable, I thought!  Of course, that's USD so us Canadians have to include the exchange and taxes and shipping (ugh...).  But still, our grand total for this piece of fabric was $26.53.  Not terrible for a nice piece of art.

I was really happy with the quality and the design when it came.  First, I trimmed the edges and ironed and hemmed them as straight as I could.  Since the map is a blue background it was easy to see the edge of the graphic on the white fabric - straight lines :)

We also bought the wood from Home Depot and had it cut on site.  I think we made each piece 40", so we could have 2 extra inches on each side for hanging.  We stained them with some leftover stain from another project.


Line it up and hot glue away!  Here's the back:


We just measured and tied a piece of twine and voila!  A super easy DIY Map.


How stunning are these photos by Christine from Click Photography (the first and last photo)!  She is AMAZE!  If you're in KW and the surrounding area - look her up!


Wednesday, August 3, 2016

Cards on Etsy!


I can remember when Hallmark had a store in my hometown, and my mom would take my sister and I there.  We spent what felt like HOURS in that store, my mom reading through each card to pick exactly the right one.  I liked to read through all the funny ones, get embarrassed when I accidentally opened a loud musical one, and try to re-match the proper cards & envelopes in their correct holders.

I still love looking at cards and admiring the clever, creative designs.  But I'll admit, the $5 price tag these days is way too steep for me.  I would much rather a) put that $ into the gift I'm giving with the card and b) write my own message inside the card.  I'm assuming I'm not alone!

So I've started my own Etsy shop called Creative Space Designs.  So far my best sales are from simple birthday cards.  Here's how it works:

- For $2.95, you can buy a downloadable card.  Some of the cards even come with 4 different colour options, and a black and white version that is great for kids (or adults!) to colour and personalize.
- Once you purchase it, a PDF is instantly available for you to download and print.
- The cards are designed to be 2 to a page, and they are for 8.5x11" card stock (or regular paper if you prefer).
- Once you print it out, you just trim it in half and fold it.  
- The inside is blank so you can write whatever you want!
- The best part is, YOU CAN PRINT AS MANY AS YOU NEED so you should never be stuck without a card :)

Thanks for checking it out!  And if you have any requests for new designs, send them my way!


Friday, July 29, 2016

San Francisco!

Our little fam recently traveled to San Francisco, Portland & Seattle!  Our baby girl turned 4 months old while we were away.  She was a champion traveler!  I admit, I was nervous about...everything.  Will her ears adjust on the flight?  Will she sleep well on the go?  Will she have enough play time?  Will it be awkward to get around with a stroller?  And so on...  but in the end, it was great.  Of course, there were a few meltdowns (mom & dad included, who are we kidding), some jet lag, & many awkward moments.  Even some 4 month sleep regression thrown in there for good measure.  I've concluded that traveling with a baby is not as easy/fun as traveling by ourselves...but it's much more fun than not traveling at all!

Here's a few photos, and a couple of tips for traveling with a baby in San Francisco:

We were blessed that the baby did SO well on all the flights we took.  She actually slept through take off/landing of the first flight.  I wondered if I should nurse/put her pacifier in, since I had read that it helps their ears adjust.  But she was totally out, and didn't notice a thing!  She was awake through other take off/landings and still did just fine.  Other than that, we just kept our little eat/play/sleep routine happening and she was happy and smiling at anyone who would smile back.


Our first night, we saw a Giants game.  They were playing the Oakland A's, so it was a great rivalry.  Our first lesson was a hard one though.  That night we discovered that a) San Francisco is windy/cold!  b) Don't plan an outing on the first night, with a jet lagged baby who just wants to sleep.  Especially when it's noisy.  And cold.  And she's strapped to you for 4 hours solid.  Let's just say it was the worst night of our trip (especially for me).


The clam chowder bread bowl at Boudin's is as good as they say!


So are the giant sundaes at Ghirardelli's!


The old trolleys are fun to ride, they just have narrow aisles - a bit tricky with a big stroller...


Lombard Street was fascinating!


The hills in San Francisco are an adventure on their own.  The photo above and below are from the same spot, just looking in different directions!


We love aquariums - Aquarium of the Bay was a good one.


It was windy/chilly, but our walk across the Golden Gate Bridge was well worth it.  So majestic!  It took about 45 minutes-ish each way.


Took the Go Pro on our cable car ride (and the baby in the carrier, because the stroller would definitely have been awkward/too big).


She loved it though!


All the heart eyes for bay windows everywhere!


The Painted Ladies!


A few other thoughts:

- When you travel with a baby, be flexible about when you eat.  You may want to avoid the most common times of the day to eat, especially in San Francisco because most restaurants are really small and fill up fast (also awkward if you need space for the stroller).  Ideally, we would stop to eat while the baby slept so that we could use our hands.
- I think 3.5 months was a great time to travel...especially now that we are at 4.5 months and going through the nap-resisting, night-waking, over-tired stage (such fun! :)
- RELAX!  I had to remind myself of this 1000 times a day.  It's easy to stress over every little thing, but much more relaxing to take each moment as it comes.  Be present and enjoy where you are!

Maybe we will see you again someday, San Francisco!

LinkWithin

Related Posts Plugin for WordPress, Blogger...