

I recently made this colourful geometric felt pillow, and it was so easy & cute that I thought I'd share how I did it.
I love this project for a few reasons:
1. Felt is inexpensive (50 cents a sheet at Michaels!)
2. You can make it whatever colour and size you want.
3. If you can sew in a relatively straight line, you can do it :)
I'm nervous about calling this a tutorial, because it's more of a guideline... I'm not a professional by any means - I'm just willing to TRY. Professionals will likely cringe at my lack of measuring and precision (so if you're a pro, be warned!) But if you're up for giving things a try, here's my play-by-play. Modify as you wish!


First things first - choose your felt. These sheets were each 50 cents at Michaels (and I think I only used half of each one for this project). Also, I used some leftover faux white leather for the back, but you can use whatever you want (cotton, solid felt, anything really!)

The only other things you need are a sewing machine, tape measure, thread, and scissors.

Step one is to cut the felt into squares. Mine were more of a rectangle at 4.5"x5". To be honest, I only did that because you can fit 2 across the piece of felt, so none was wasted. The beauty of this project is that you can make any size pillow you want. The concept is like a quilt - the more squares you make, the bigger the cover will be. This pillow ended up being about 12"x14", and the first one I made (see the picture at the bottom), was 16"x16". You can also make the squares any size you want, as long as all the squares are equal in size.


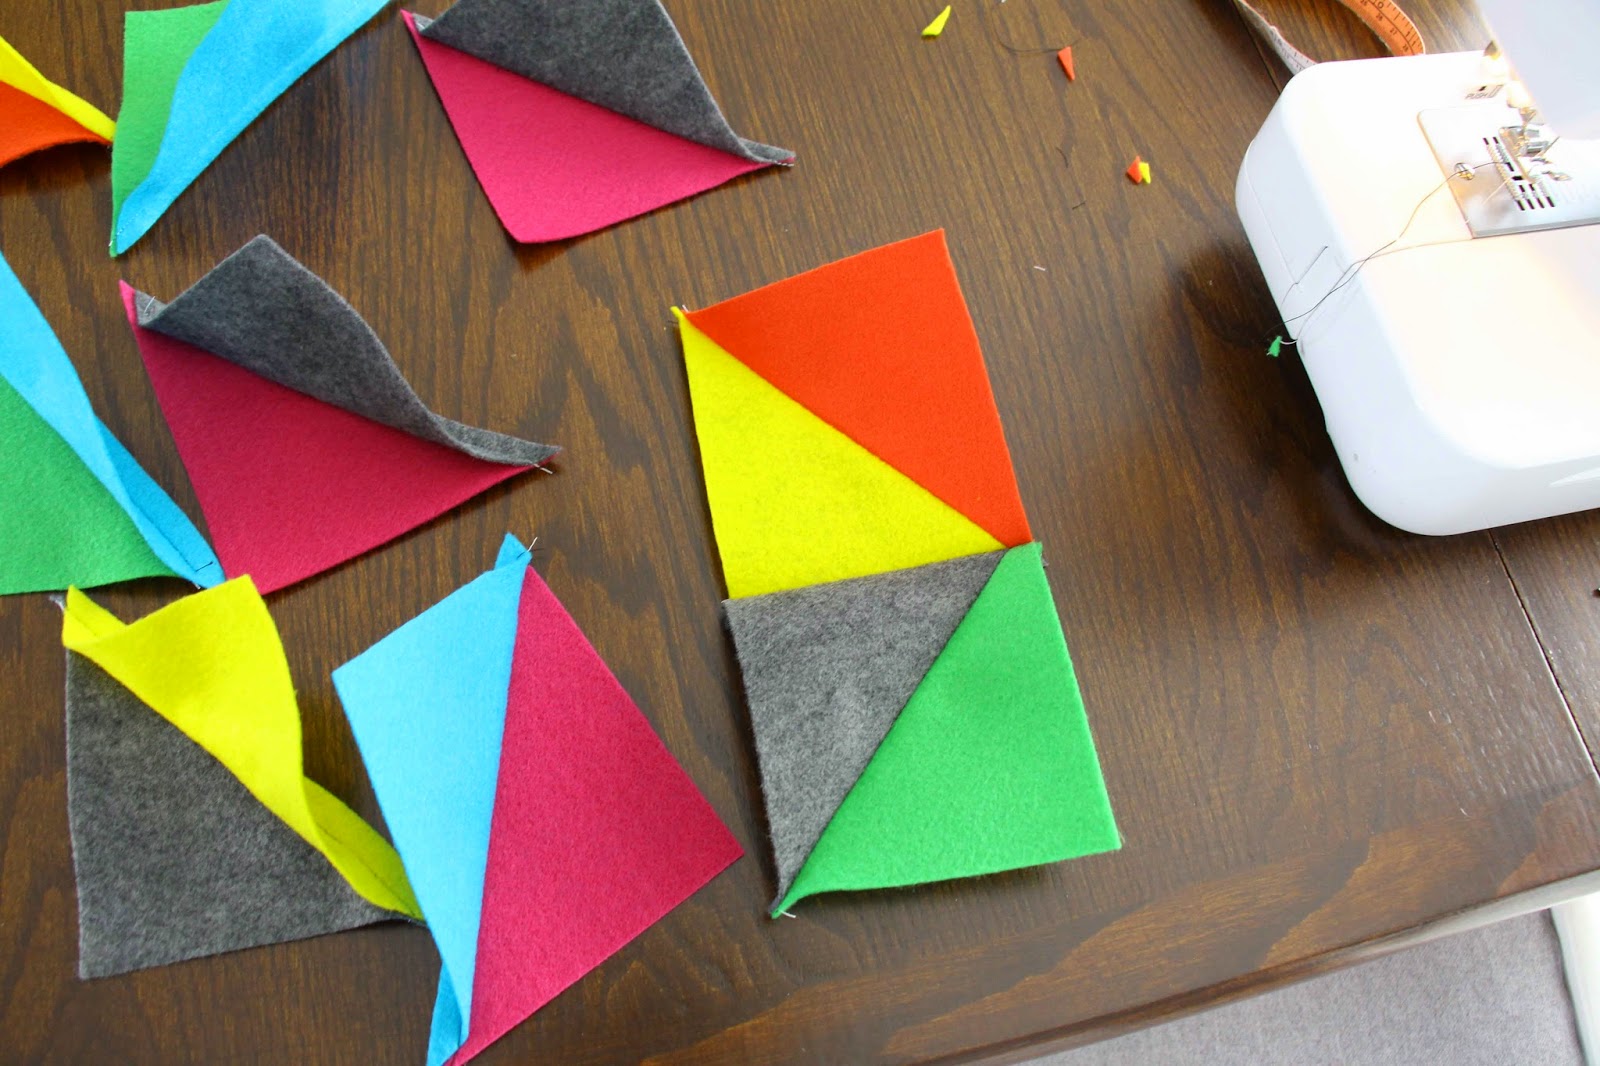
Then, cut each square in half, from corner to corner.


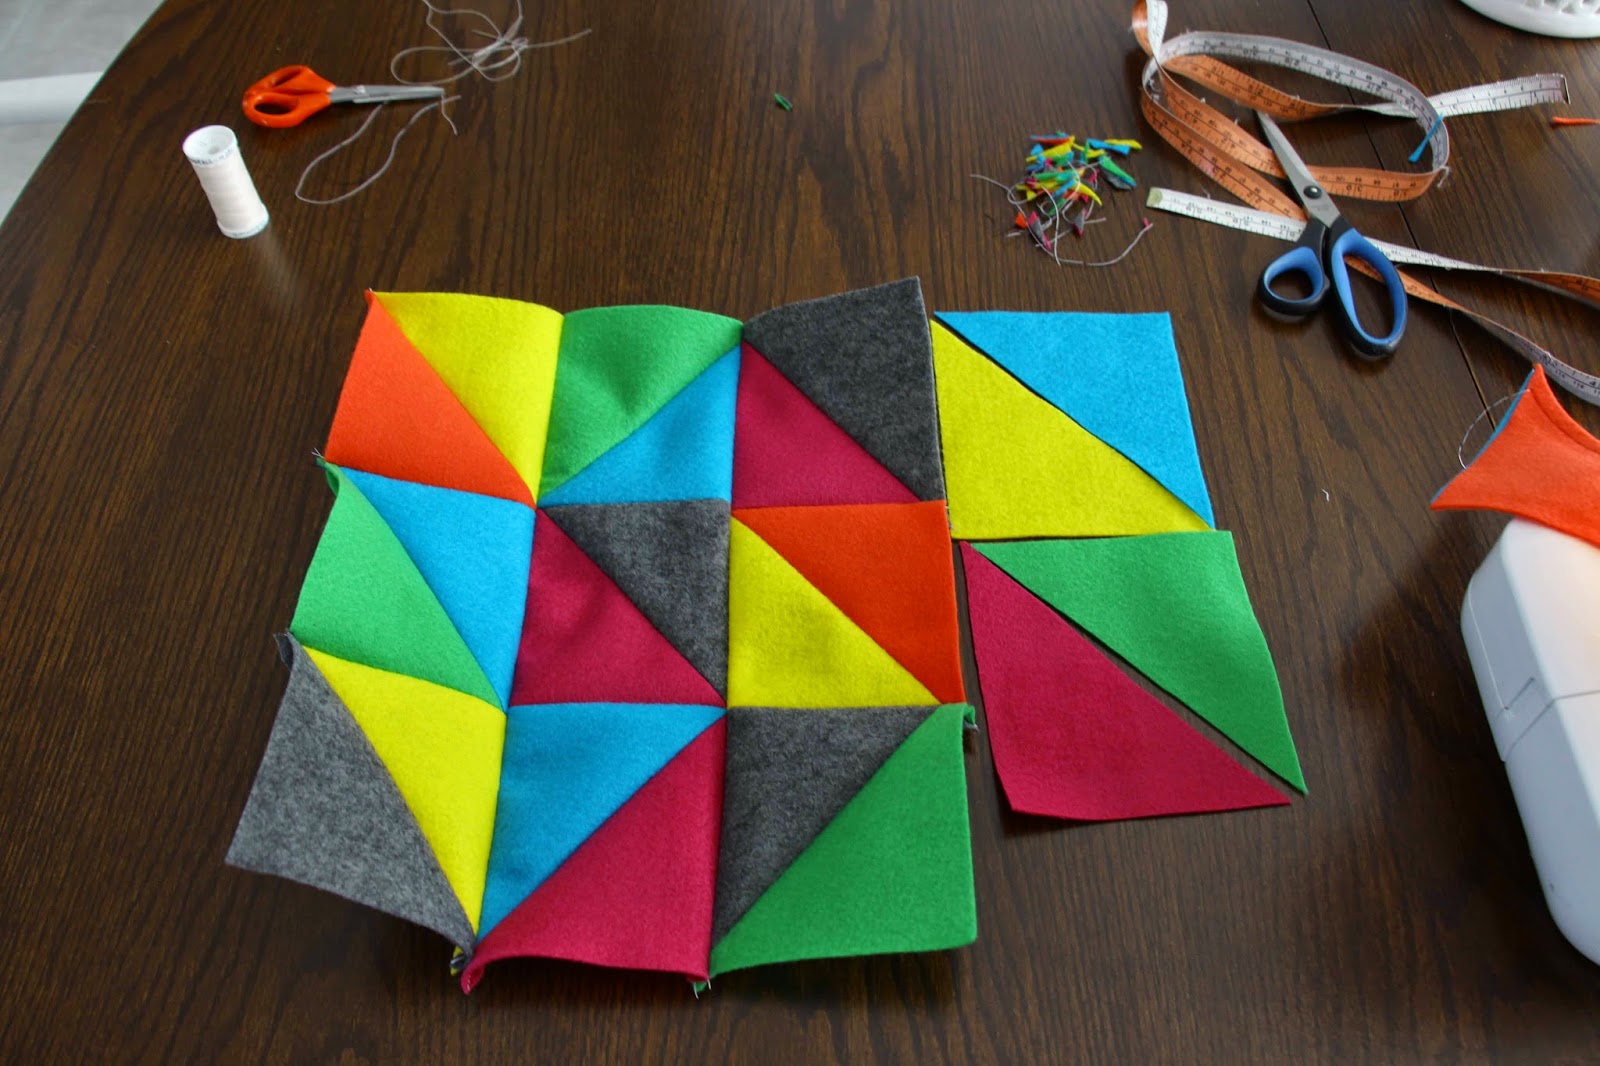
Once you have all the triangles cut out, rearrange them into squares and rows. Change them around until you have a pattern that you like. Tip: take a picture before the next step, since they will get moved around as you sew - then you can reference it later!

Time to start sewing! You will sew 2 triangles together, to make squares once again.


Once you have all the squares stitched together again, lay them out so you can see them in rows.

Trim off the corners so they aren't so bulky - that make the next step a bit easier.

Work in rows as you sew the squares together. I started in the bottom corner, and then chose the square above it to start. Put the right sides together and sew.


Now that you have 3 strips, sew the long sides together. Keep the right sides together. (Shown below)


Here you can see my 3 strips sown together. But I decided it was too small. So I added a 4th strip!

Here is the big lesson I learned - because felt is pretty thick, lots of the fabric is eaten up in the seam allowances. So the squares ended up being much smaller than I thought they would. If I do this project again, I will allow for at least 1/2 to 3/4 of an inch all the way around.

Onto the back of the pillow. I posted a tutorial on the envelope style pillow quite a while ago (see it here). I used the same method this time too. It's super easy to do because you can just sew all the way around and you don't have to worry about closing the seam once the pillow is inside. Plus, if you ever want to wash the outside you can just take it off.


Trim off all the excess and turn it right side out.

Stuff in the pillow and you are good to go! For this one, I made my own pillow form, but you can easily buy one and make a case to fit.
Happy sewing!
Oh, and here's the first one I made!

No comments:
Post a Comment